Coaches Corner

Get Clipped In

Get Coach Jon's tips, routes, and ride updates delivered to your inbox.

No spam. Just cycling.
You're in. See you on the road. 🚴

Training Plan Builder

Training Plan Builder | Coaches Corner
Coaches Corner

Training Plan Builder

Build a personalized training plan based on your goal distance and event date.
🚴
Coach Jon's Rule of Thumb

You don't need to ride your goal distance in training. Your peak long training ride should be about 65-70% of your event distance. Build up to a comfortable, repeatable weekly volume using three rides at roughly 25% / 25% / 50%. When that week feels normal and not like a peak effort, you're ready for event day. The group energy, rest stops, and adrenaline will carry you the rest of the way.

Goal Distance Peak Long Ride Weekly Total Ride 1 Ride 2 Long Ride
25 miles 18 mi 25 mi 6 mi 6 mi 13 mi
50 miles 35 mi 50 mi 12 mi 13 mi 25 mi
66 miles 45 mi 66 mi 16 mi 25 mi 25 mi
75 miles 50 mi 75 mi 19 mi 19 mi 37 mi
100 miles 65-70 mi 100 mi 25 mi 25 mi 50 mi

Build Your Plan

🚲

Enter your goal distance and event date to generate a personalized training plan based on Coach Jon's methodology.

Is This Ride For Me?

Is This Ride For Me? | Coaches Corner
Coaches Corner

Is This Ride For Me?

You're reading this blog. You're curious. You're not sure. Let me answer the question.

I get this question more than any other. It comes in different forms, but the feeling behind it is always the same:

I'm too old. I'm too young. I'm not a cyclist. I'm not an athlete. I haven't been on a bike in years. I don't own a bike. I wouldn't know where to start. I'd slow everyone down.

If any of that sounds familiar, this post is for you.


Who Does This Ride?

Let me start with my own family, because it tells you everything you need to know about who this ride is for.

In my family, the Ride to Cure Diabetes is for: me, my wife Lindsay, my son Marlon, my dad, my sister, my father-in-law, and my brother-in-law. My mom and my daughter Luca volunteer. My mother-in-law Marilyn was part of this too. Three generations. Different ages, different fitness levels, different reasons for being there. All connected to the same ride.

When I was in my 20s, this ride was about going as fast as I could. I wanted to hammer every mile. In my 30s and 40s, it became about staying active with kids and riding alongside my family as they grew up around this event. The ride has meant something different to me in every chapter of my life, and it will mean something different to you too.

The Novice

Never done a long ride. Might not even own a bike yet. Looking at this whole thing wondering if it's crazy.

The Returner

Used to be active. Life happened. Looking for something to get back into, maybe something that actually matters.

The Young Rider

Looking for adventure, a challenge, a story to tell. Wants to do something bigger than a 5K.

The Empty Nester

Kids are grown. Time has opened up. Wants a goal, a community, and a reason to get out of the house on Saturday mornings.

The Experienced Cyclist

Already rides. Wants to put those miles toward something meaningful and ride with a team that cares about more than Strava segments.

The Family Member

Has a connection to Type 1 Diabetes. A child, a sibling, a parent, themselves. This ride is personal.

I have seen every one of these people on our rides. I have coached every one of them. And I can tell you that the ones who had the best experience were not the fastest or the fittest. They were the ones who decided to show up.


A Conversation I Had This Week

I was on the phone recently with someone who's thinking about joining us. He hasn't been on a bike in a long time. He's navigating some health challenges. He's at a point in his life where he's looking for something physical to commit to, something that could become his thing again, the way sports used to be when he was younger.

He had a lot of questions. What kind of bike do I need? How much should I spend? Do I need special shoes? Am I going to be the slowest person out there?

Here's what I told him: Don't overthink any of it.

You don't need a $5,000 bike. You need a bike that fits you. You don't need to be fast. You need to be consistent. Ride two or three times a week. Get some time in the saddle. Build gradually. The endurance will come.

I told him to visit a couple of local bike shops, test ride a few bikes, and find something comfortable in his budget. I told him to get a helmet, get good shorts, and get some flat-pedal cycling shoes. I told him he could figure the rest out as he goes.

And I told him the most important thing: bike riding gets better with the right people. This isn't a sport you have to do alone. The group makes it fun. The cause makes it meaningful. And the combination of those two things is what keeps people coming back year after year.

He asked me if he'd be ready by the ride. I told him to take a leap of faith. Show up. Decide if you like it. Everything else will follow.


What You Don't Need

You don't need to be a cyclist. You'll become one.

You don't need to be young. Some of our strongest riders are in their 50s and 60s. Cycling is a low-impact sport that is remarkably kind to aging bodies. It's one of the few endurance activities you can start later in life and genuinely excel at.

You don't need to be fast. Our training rides are not races. We ride together. We stop together. Nobody gets left behind.

You don't need expensive gear. You need a safe bike that fits, a helmet, and good shorts. That's it. Everything else, including the clipless pedals, the carbon wheels, and the matching kit, is optional and can come later. Or never. Nobody cares.

You don't need to have Type 1 Diabetes. Many of our riders do. Many don't. Some ride because T1D is in their family. Some ride because they believe in the cause. Some ride because a friend asked them to and they said yes before they could talk themselves out of it. All of those are good reasons.


What You Do Need

A willingness to try. That's it. That's the whole list.

Everything else, the training, the gear, the nutrition, the route knowledge, the group riding skills, that's what this blog exists for. That's what the training rides are for. That's what I'm here for.

I've been coaching this ride for over 20 years. I've helped people who hadn't been on a bike since childhood complete 100 miles. I've watched first-time riders become the people who recruit the next wave of first-time riders. The pattern is always the same: someone decides to show up, they discover they love it, and they can't believe they almost didn't do it.

The Part Nobody Talks About

People sign up for the ride because of the cause. They come back because of the people. There's something about training together over months, suffering up hills together, sharing water bottles and bad jokes at rest stops, and then crossing a finish line together that creates friendships you don't get anywhere else. This ride will surprise you.


So, Is This Ride For You?

If you've read this far, you already know the answer.

You're here because something about this caught your attention. Maybe it's the cause. Maybe it's the challenge. Maybe it's the idea of having something to train for, something bigger than yourself, something that gets you out the door on a Saturday morning with a sense of purpose.

I'm not going to tell you it's easy. Training for a long-distance ride takes commitment. There will be early mornings. There will be sore legs. There will be at least one ride where you wonder what you got yourself into.

But I will tell you this: it's worth it. Every single time.

Stop Wondering. Start Riding.

Reach out to Coach Jon. Come to a training ride. Bring whatever bike you have. We'll figure the rest out together.

The only thing you'll regret is not signing up sooner.

Breakthrough T1D Ride to Cure Diabetes. Coach Jon has been riding since 2003, coaching since 2006, and waiting for you to show up since before you knew this ride existed.

EAT. DRINK. DON'T BONK.

Eating and Drinking on the Bike | Coaches Corner
Coaches Corner

Eat. Drink. Don't Bonk.

Why your spin class instincts will betray you on a long ride, and what to do about it.

Most people come to cycling from other sports or activities. Maybe it's the gym, maybe it's running, maybe it's group fitness classes. And that's great. But here's the thing: those activities probably aren't true endurance efforts that require you to think about fueling and hydrating for a longer, sustained activity.

We can all get through an hour at the gym without eating. No one brings a sandwich to OrangeTheory. And it's very common for someone new to cycling to say something like: "I burned 700 calories in a spin class and didn't need to eat. I'll be fine."

I've heard this many times. And that kind of thinking gets riders in trouble.

A 45-minute spin class and a 3-hour training ride are fundamentally different animals. The fueling strategy that works for one will absolutely fail you on the other.

The Science (Keep It Simple)

Your body stores energy as glycogen in your muscles and liver. Think of it as your gas tank. The average person stores roughly 1,500 to 1,800 calories of glycogen, and a trained endurance athlete can store more. That sounds like a lot, but here's the problem: cycling at a moderate pace burns somewhere between 500 and 800 calories per hour. At higher intensities, even more.

Do the math. If you start with a full tank and you're burning through it at that rate, you have roughly 90 to 120 minutes before your glycogen reserves drop to a level where your body simply cannot sustain the effort. Your muscles run out of readily available fuel.

When that happens, you bonk.

What Bonking Feels Like

Bonking is not just "being tired." It comes on suddenly and it is unmistakable. One minute you feel fine, and the next minute your legs feel like concrete, your brain gets foggy, you can't hold a conversation, and the idea of pedaling one more mile feels physically impossible. Your body is telling you the tank is empty. Some riders get dizzy or lightheaded. Some get emotional. It is deeply unpleasant, and it can be dangerous if you're on the road in traffic.

The critical thing to understand is that bonking is preventable. It is almost always caused by not eating or drinking enough during a ride. It is not a sign that you aren't fit enough. It's a sign that you didn't fuel properly.


01 Eating on the Bike

The goal is simple: replace some of the carbohydrates you're burning before your glycogen stores bottom out. You don't need to replace all of them. You just need to keep the tank from hitting empty.

Here are the general guidelines used by sports nutritionists and the cycling community:

Fueling by Ride Duration

Under 60 minutes: You're fine. Your glycogen stores can handle it. Just drink water.

60 to 90 minutes: A small snack or an energy drink is a good idea, especially if you're riding hard. This is the gray zone.

90 minutes to 3 hours: Aim for 30 to 60 grams of carbohydrates per hour. That's roughly one energy bar, one banana, or two gels per hour.

3+ hours: You need 60 to 90 grams of carbs per hour. This is the territory where fueling is no longer optional. It's the difference between finishing and not finishing.

The most important rule: start eating early. Don't wait until you feel hungry. By the time you're hungry, you're already behind, and it takes time for your body to process and absorb what you eat. Most coaches recommend eating something within the first 30 to 45 minutes of a longer ride and then continuing on a schedule every 20 to 30 minutes after that.

What Should You Eat?

There's a massive sports nutrition industry built around this question, but the honest answer is: whatever works for your stomach. Here's a rough hierarchy:

Energy gels are the most efficient option. They're compact, fast-absorbing, and easy to eat while riding. Brands like GU, Maurten, and SIS are popular. Some have caffeine. They taste like sweet paste. Most people either love them or tolerate them.

Energy bars and chews are a step up in terms of substance. They give you something to actually chew on, which some riders prefer. Clif Bars, Skratch chews, and Honey Stinger waffles are popular options.

Real food absolutely works. Bananas, PB&J sandwiches cut into quarters, fig bars, rice cakes, even salted potatoes. Professional cyclists eat real food on the bike all the time. If your stomach handles it well, there's nothing wrong with it.

Coach's Take

Practice eating on training rides. Don't try anything new on ride day. Your stomach needs to get used to digesting while your body is working hard, and different products affect different people differently. Find what works for you and stick with it.


02 Drinking on the Bike

Dehydration sneaks up on you. By the time you feel thirsty, you've already lost performance. The general rule of thumb is one standard cycling water bottle (roughly 20 to 24 ounces) per hour. In hot weather, closer to two bottles per hour.

But here's where it gets more nuanced: water alone isn't always enough.

For rides under an hour, plain water is totally fine. But once you get past 60 to 90 minutes, you're losing electrolytes through sweat, specifically sodium, potassium, and magnesium. These are the minerals that keep your muscles firing and your brain functioning. Losing too many of them causes cramps, fatigue, and in extreme cases, a dangerous condition called hyponatremia (when your sodium levels drop too low).

This is why sports drinks and electrolyte mixes exist. They aren't just marketing. For longer rides, mixing an electrolyte powder into one of your water bottles makes a real difference.

A Simple Two-Bottle Setup

Bottle 1: Plain water. Good for quick sips, splashing on your face, washing down food.

Bottle 2: Water mixed with an electrolyte/carb drink like Skratch Labs, Nuun, Liquid IV, or Gatorade Endurance. This is your fuel bottle.

On rides over 2 hours, drink the electrolyte bottle first. Those carbs take time to get into your bloodstream, so the earlier you start, the better.

Don't Overdrink Either

Drinking too much plain water without electrolytes can actually be dangerous. It dilutes your sodium levels and can lead to hyponatremia, which causes confusion, nausea, and in serious cases, seizures. The goal is steady, moderate intake throughout the ride. Not chugging a whole bottle at once every 45 minutes.


Putting It All Together

Here's what a fueling plan looks like for a typical training ride of 2.5 to 3 hours, the kind of distance we'll be doing as we build toward the big ride:

Night Before
Eat a normal, balanced dinner. Don't overthink it. Pasta, rice, protein, vegetables. Stay hydrated through the evening.
Morning
Eat breakfast 2 to 3 hours before the ride. Oatmeal, toast with peanut butter, a banana, yogurt. Something with carbs that you know sits well. Do not skip breakfast. Your liver glycogen is partially depleted from sleeping. You need to top off the tank.
Pre-Ride
Drink 16 to 20 ounces of water in the 2 hours before you ride. Fill your bottles. Pack your food.
First 30 Min
Start sipping from your bottles. Take a few swigs every 10 to 15 minutes. Get in the habit early.
45 Min In
Eat something. A gel, half a bar, a few chews. Don't wait until you're hungry.
Every 20-30 Min
Continue eating small amounts and drinking steadily. Alternate between water and your electrolyte bottle.
Post-Ride
Eat a meal with carbs and protein within 30 to 60 minutes of finishing. Your body is primed to absorb nutrients and start rebuilding glycogen stores for the next ride.

The Spin Class Trap

Let's come back to where we started. The spin class mentality.

A 45-minute spin class might burn 400 to 700 calories. That's intense, but it's short enough that your glycogen stores can handle it without any mid-workout fueling. You sweat, you're tired, you grab a smoothie after. No problem.

A 3-hour training ride at moderate effort burns somewhere around 1,500 to 2,400 calories. That's a completely different equation. Your glycogen tank, even fully topped off, cannot cover that on its own. Without eating on the bike, you will hit a wall. It's not a question of toughness or fitness. It's basic physiology.

The Mistake

"I crushed it in spin class on nothing but a coffee. I'll be fine on today's 40-mile ride."

Result: bonk at mile 25, drop from the group, crawl home, question all life decisions.

The Smart Play

Breakfast 2 hours before. Two full bottles (one water, one electrolyte). A gel at 45 minutes, a bar at 90 minutes, a gel at 2 hours.

Result: strong all day, finish with the group, actually enjoy the ride.
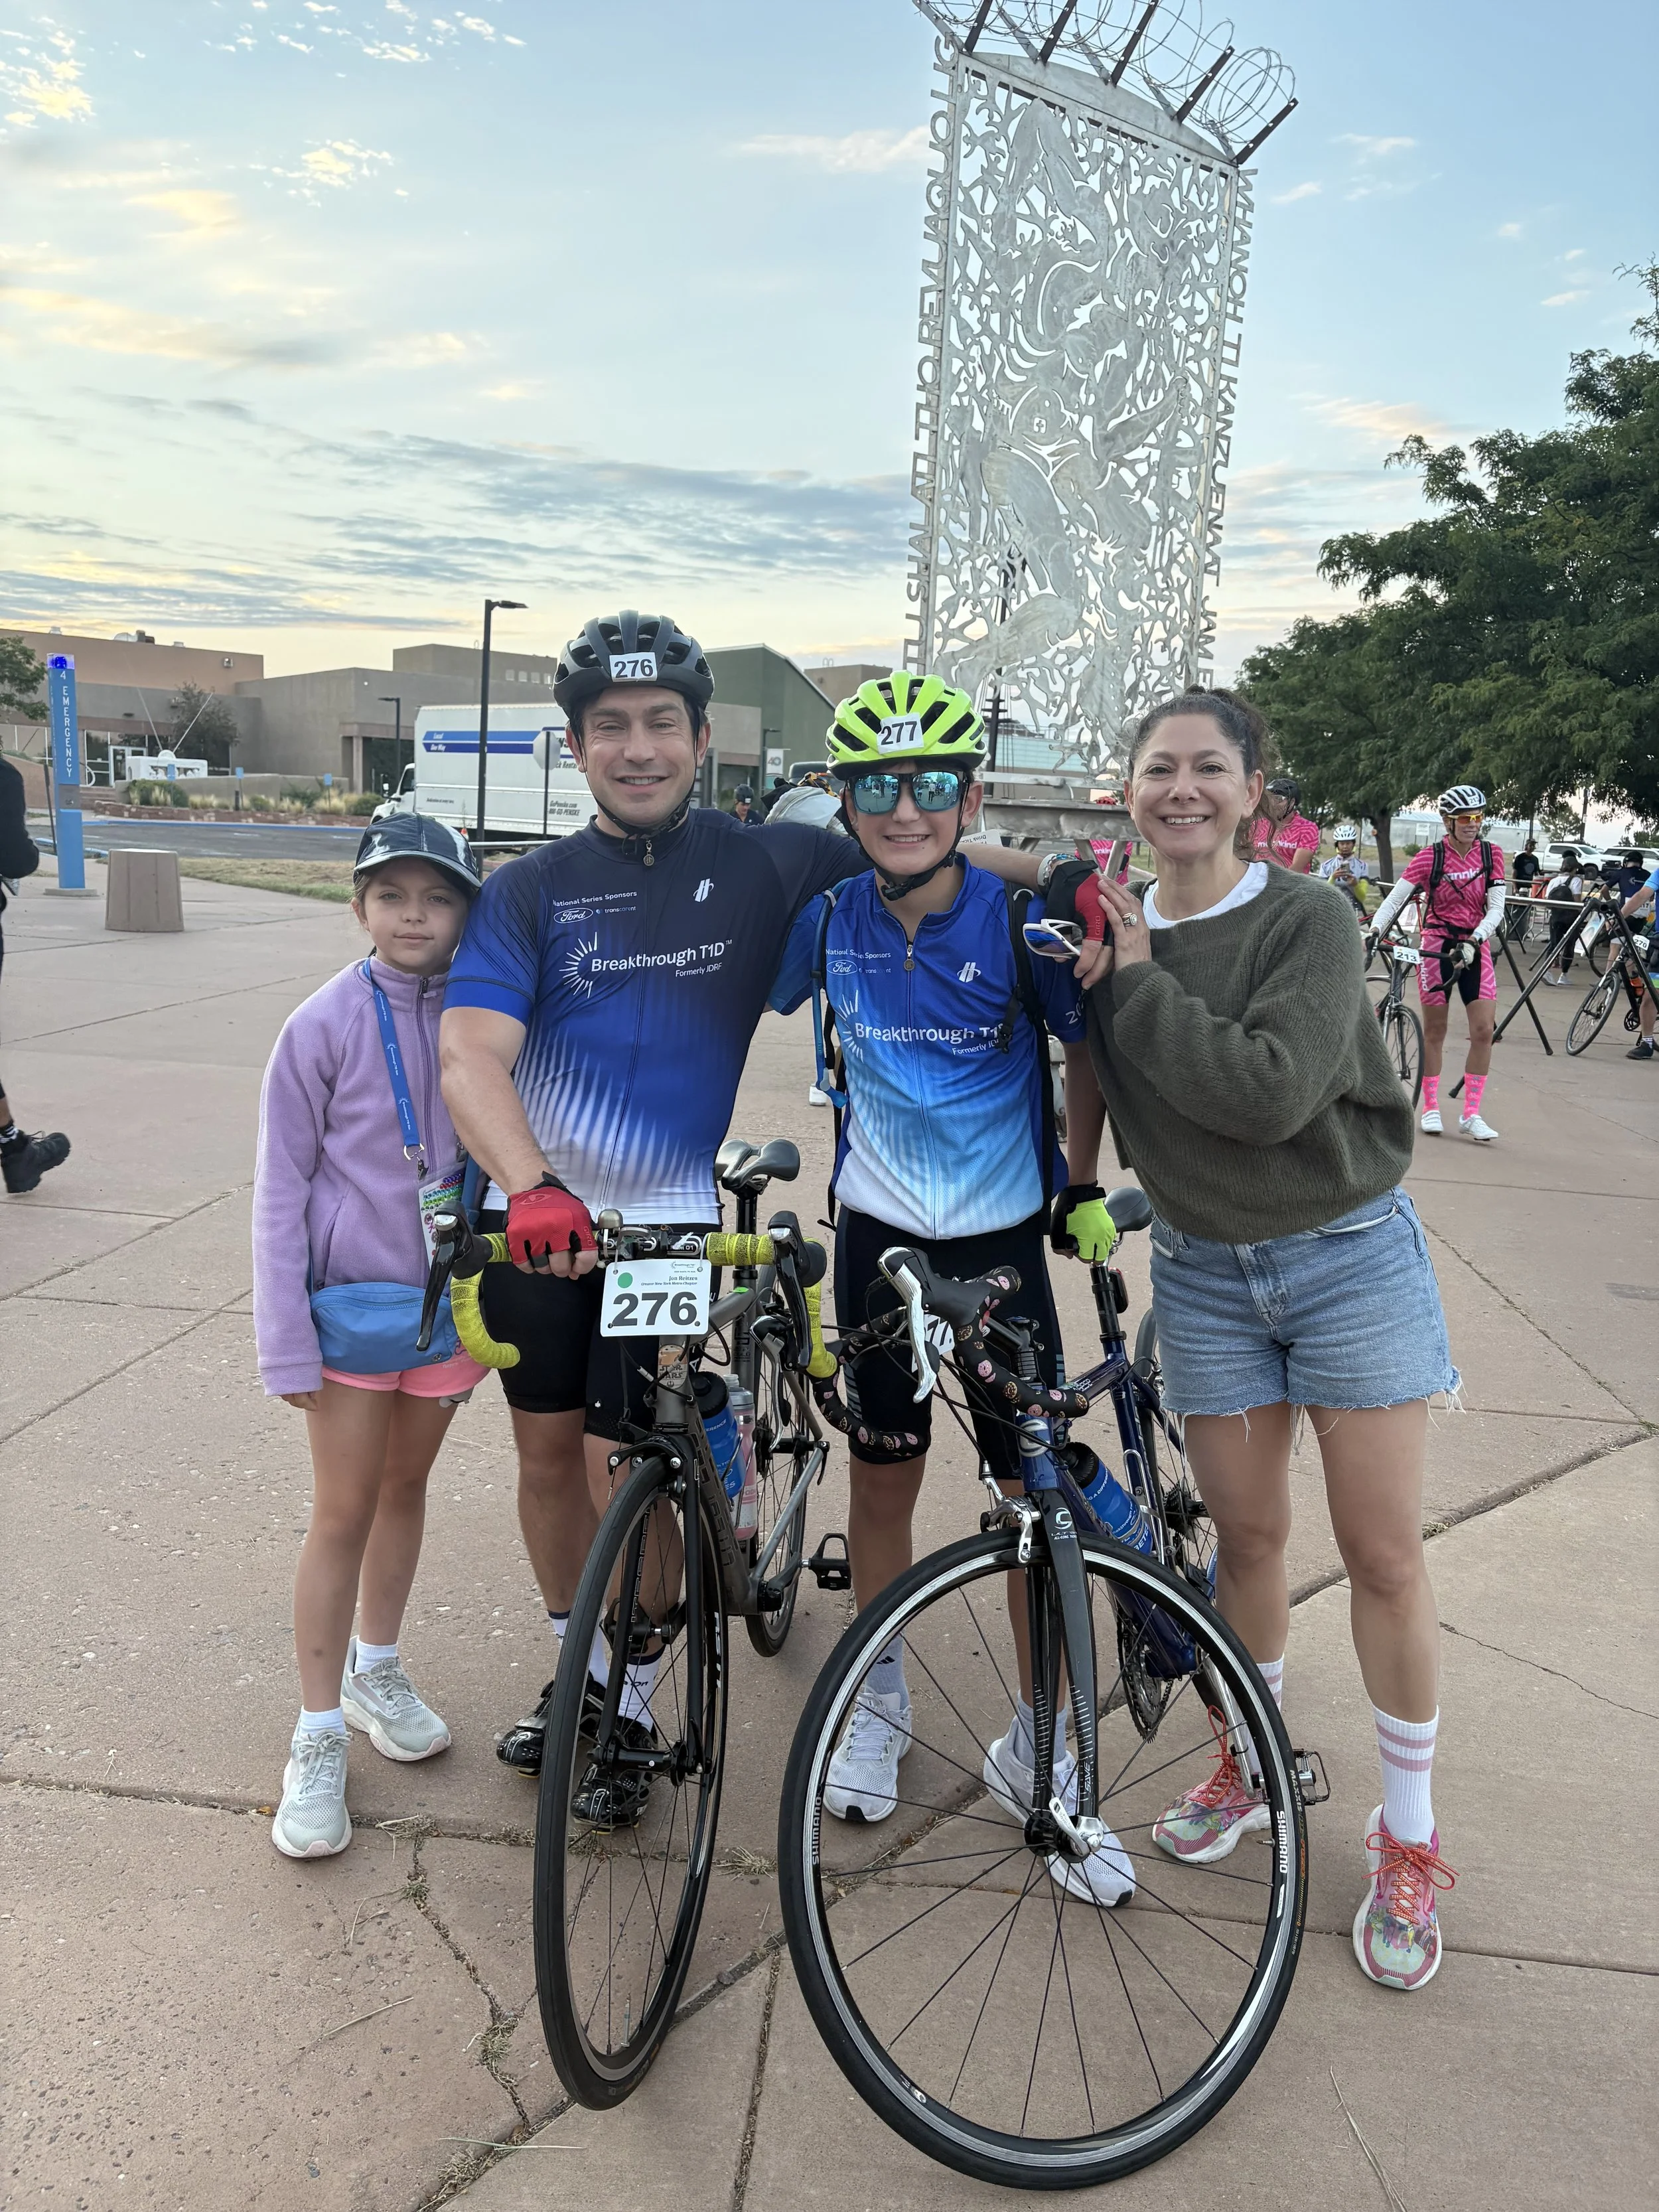

For Our T1D Riders

This is the Ride to Cure Diabetes. Many of the riders on our team are living with Type 1 Diabetes, and everything I just wrote about fueling and hydration applies to you too. You are a human who needs fuel to ride a bike. But you also have a layer of complexity that other riders don't, and it deserves its own conversation.

I am not qualified to give you medical advice. I want to be clear about that. But I have been coaching T1D riders for over 20 years, I live with T1D in my own family, and I've seen what works and what doesn't on the road. So here's what I'll say:

You cannot wing this. You cannot figure it out as you go. You need a strategy for managing your blood sugar on training rides, and you need to develop that strategy before you show up for your first long ride. Work with your endocrinologist or diabetes care team to build a plan specific to you.

This Is Not Optional

Endurance cycling dramatically increases insulin sensitivity. Your metabolism is jacked during a ride and can stay that way for hours afterward. The insulin-to-carb ratio that works for you at the dinner table will not work for you on the bike. If you don't adjust, you are at serious risk of hypoglycemia, and that is dangerous on a bicycle in traffic at 18 miles per hour.

Here are some of the tools and strategies that T1D riders use. Again, your specific approach should be developed with your care team:

Exercise mode. Most modern insulin pumps and closed-loop systems (Omnipod 5, Tandem Control-IQ, Medtronic 780G, and others) have an exercise or activity mode. This raises your blood sugar target, typically to around 150 mg/dL, and reduces automatic insulin delivery so your system isn't fighting your muscles for glucose. The important thing: activate it early, at least 1 to 2 hours before the ride. The algorithm needs time to adjust.

Temp basal. If your pump supports temporary basal rate adjustments, reducing your basal rate before, during, and after a ride is a common strategy. How much to reduce it depends entirely on you, the intensity of the ride, and your individual physiology. Some riders cut it by 50%. Some cut it more. This is something you figure out through careful experimentation on shorter training rides, not on the day of a 60-mile group ride.

Know your on-the-bike insulin-to-carb ratio. You still need to eat. You still need carbs. And if you're on a pump, you still need to bolus for those carbs. But your ratio on the bike is very different from your ratio at rest. Personally, mine is about a third of my normal I:C ratio. Yours may be different. The point is that you need to know your number before you clip in.

Your CGM is your best friend. If you're wearing a continuous glucose monitor, you have a real-time view of where your blood sugar is and where it's headed. Use it. Check your trend arrows before eating, before bolusing, and especially before hitting a climb. A downward arrow on a hill means you need to eat now, not in 10 minutes.

Coach's Take

The T1D riders I've coached who have the best rides are the ones who treat their diabetes management as part of their training, not separate from it. They test their fueling strategy on every training ride. They know their numbers. They carry glucose tabs or fast-acting sugar in an easy-to-reach jersey pocket. And they are not shy about telling the group they need to stop. Nobody on this team will ever give you a hard time for managing your health. That's literally why we ride.

Post-Ride Matters Too

Your increased insulin sensitivity doesn't end when you get off the bike. Many T1D riders experience lows for 12 to 24 hours after an intense or long ride as the body works to replenish glycogen stores. Keep your exercise mode or a reduced basal running after the ride. Monitor closely. Have a recovery meal. And keep checking through the evening and overnight. This is not the night to set it and forget it.


A Few Final Notes

Your gut is a muscle too. If you've never eaten while exercising, your digestive system might protest the first few times. This is normal. Start with small amounts on shorter rides and build up. Your body will adapt.

Don't experiment on ride day. Whatever you plan to eat and drink during the big ride, practice it on training rides first. The last thing you want is to discover that a particular gel gives you stomach cramps at mile 50.

Set a timer. Seriously. When you're riding in a group, having a conversation, enjoying the scenery, it's easy to forget to eat and drink. Set a recurring timer on your watch or phone for every 20 minutes. When it goes off, take a sip and eat something. It's a small habit that prevents a big problem.

If you feel it, it's already too late. By the time you feel hungry or thirsty on a ride, you're already in a deficit. The whole point of a fueling plan is to stay ahead of it. Eat before you're hungry. Drink before you're thirsty.

You are training for a 100-mile ride. You are not toughing it out. You are managing your energy like an endurance athlete, because that's exactly what you are.

Questions about nutrition or fueling plans? Reach out to Coach Jon anytime.

The Gear You Actually Need

The Gear You Actually Need | Coaches Corner
Coaches Corner

The Gear You Actually Need

What to buy, what to skip, and the one piece of gear that will change your life on the bike.

I had a conversation recently with a potential rider who was excited about joining us but had no idea what gear to buy. And that's totally normal. When you're new to cycling, the gear options are overwhelming, the prices range from reasonable to absurd, and nobody tells you what actually matters versus what's just marketing.

So here's the honest rundown. This is what you need, what you might want, and what you can skip entirely.

01 Helmets

Essential

Non-negotiable. You do not ride without a helmet. Ever.

When you're shopping, look for a helmet with MIPS technology (Multi-directional Impact Protection System). MIPS adds a low-friction layer inside the helmet that allows it to rotate slightly on impact, reducing rotational forces on your brain. It's one of the most meaningful safety advances in cycling gear over the past decade, and it's available at nearly every price point now.

You'll notice that helmets come in road-specific and mountain bike-specific designs. The key differences come down to venting and coverage. Road helmets prioritize airflow with large vents to keep you cool over long rides. Mountain bike and BMX helmets provide more coverage around the back of the head and are built to take harder hits, but they run hotter because of it.

Coach's Take

For our rides, you want a road helmet. You need enough venting to stay cool and comfortable over 20, 40, 60 miles. An MTB helmet on a July ride in Westchester will cook you. Road helmets from Giro, Bell, Specialized, and others come with MIPS starting around $60-80. You don't need to spend $250 to be safe.


02 Shorts

Essential / Star of the Show

Here it is. The hidden gem. The most important piece of gear you will buy. The thing nobody tells you about until you've already suffered through a ride in running shorts and wondered why you can't sit down the next day.

I cannot overstate this: get good shorts.

How good? The best your budget will allow. This is not the place to save $30. Quality cycling shorts from a reputable brand make a profound difference in your happiness, your ability to recover after a ride, your skin health, and your comfort both on and off the bike.

If you buy one piece of gear based on this post, make it the shorts. Everything else can be upgraded over time. Bad shorts will make you miserable on day one.

The secret is the chamois (pronounced "shammy"), which is the padded insert sewn into cycling shorts. A good chamois is engineered to reduce friction, wick moisture, and cushion you in the places that take the most pressure on a bike saddle. A cheap chamois bunches up, holds moisture, and creates the kind of problems you really don't want to deal with 30 miles from home.

Brands that consistently deliver quality chamois construction:

Specialized Castelli Pearl Izumi Assos

You'll see two styles: traditional shorts (tight, lycra, pull-on) and bib shorts (same thing but with suspender-like straps over the shoulders). Bibs are more comfortable for longer rides because they eliminate the waistband. But either works. Pick whichever style you're comfortable in.

Important

You wear cycling shorts with nothing underneath. No underwear. The chamois is designed to sit directly against your skin. Adding a layer between you and the chamois defeats the entire purpose and creates exactly the friction issues the shorts are designed to prevent.


03 Gloves

Optional

Gloves are a "maybe" for me. When I pack my gear for a ride, gloves are the thing I look at and think... do I feel like it today?

Here's the honest case for them: if you crash, your hands are the first thing to hit the pavement. Gloves protect your palms from road rash, and that matters. They also help with sweat management on hot days and provide a bit of padding on rough roads.

Here's the honest case against them: I never want more grip on my handlebars. My hands are pretty tough. And on a hot day, one more piece of gear trapping heat is one more thing making me uncomfortable.

Coach's Take

Use them if you like them. Skip them if you don't. They are not a dealbreaker. If you do go with gloves, look for fingerless cycling gloves with a light palm pad. Don't overthink this one.


04 Shoes

Essential

Running shoes are not great for cycling. They're designed to absorb impact, which means they're soft and squishy. That's the opposite of what you want on a bike. Every pedal stroke in a running shoe, your foot flexes and energy gets lost in the cushioning. It's like trying to push a car while standing on a mattress.

You want a shoe with a stiff sole that transfers your power directly to the pedal. There are two paths here depending on your pedal setup.

If you're on flat pedals (no clips), look for a cycling-specific flat shoe. These look like casual sneakers but have a rigid sole and grippy tread designed for pedal contact. A great entry point is something like the Shimano ET501. It's a flat-sole touring shoe that looks like a normal shoe, walks comfortably off the bike, and provides proper power transfer on the pedals. You can wear them to a coffee shop after a ride and nobody would know the difference.

If you're on clipless pedals (the kind where your shoe clicks into the pedal), you should have already purchased compatible shoes when you bought the pedals. The shoe and pedal need to share the same cleat system, so make sure they match. Your local bike shop will set this up for you.

How Long Do Cycling Shoes Last?

A long time. Mine are 15 years old and still going. Unlike running shoes, cycling shoes don't take the same kind of impact abuse, so the soles don't break down the same way. If the fit is good and the closure system still works, they'll last you for years.


05 Jerseys

Nice to Have

The functional case for a cycling jersey is the pockets. Three pockets across the lower back give you a place to stash your phone, a snack, your keys, and a spare tube. If you don't have a saddle bag, those pockets become pretty important on longer rides.

The material is also designed to wick moisture and dry fast, which matters when you're sweating for two hours straight. And the cut is tailored so it doesn't flap around in the wind like a regular t-shirt.

That said, there's no law saying you have to dress like a superhero on a bike ride. If you have a saddle bag and you'd rather ride in a comfortable moisture-wicking athletic shirt, go for it. Especially on our training rides, comfort beats style every time.

Coach's Take

If you're buying one jersey, get something that fits well and has back pockets. Solid colors are fine. You do not need to look like a sponsored pro to ride with us. Save the team kit fantasies for year two.


The Quick Reference

Your Gear Priority List

Must Have: Helmet (MIPS), cycling shorts (best you can afford), cycling shoes (flat or clipless)

Nice to Have: Jersey with pockets, saddle bag with a spare tube and CO2

Your Call: Gloves, sunglasses, arm warmers, cycling socks

Don't try to buy everything at once. Start with the essentials, ride a few times, and figure out what you actually need based on your own experience. Every rider is different. The gear that matters most to you after 100 miles might be completely different from what matters to the person next to you.

But get the shorts. Trust me on the shorts.

Questions about gear? Reach out to Coach Jon anytime. That's what I'm here for.

MEET JON

Meet Coach Jon | Coaches Corner
Coaches Corner

Meet Your Coach

Coach Jon Reitzes
Cycling Coach  ·  Westchester / NYC Chapter
50+
Rides Completed
19
Years Coaching
T1D
Rider & Coach

I have Type 1 diabetes. So does my daughter, Luca. Between the two of us, T1D is not an abstraction in our house -- it's infusion set changes and insulin calculations and middle-of-the-night blood sugar checks. It's the constant mental load that never fully clocks out. Luca handles it with more grace and strength than any kid should have to. But, she shouldn't have to.

That's why I ride. That's why I coach. And that's why, after 50-plus rides over more than two decades, I still line up every year because it still matters.

"I ride every mile with you -- with the same hope, and the same reason to keep going."

None of this happens without my wife Lindsay. She has completed 15-plus rides herself, which means she's not just supporting this mission from the sidelines -- she's lived it, mile after mile, year after year. She is the backbone of this family's commitment to Breakthrough T1D, and whatever success we've had as a fundraising team has her fingerprints all over it.

I clipped in for the first time as a Breakthrough T1D rider in 2003. By 2006 I was coaching. I've ridden in Death Valley heat, Vermont hills, and New Mexico altitude. Last year my son Marlon rode Santa Fe alongside me and came home as Young Rider Champion. That finish line meant everything.

In August 2026, Marlon and I are heading to the Pacific Northwest for the inaugural Breakthrough T1D Ride in the Cascades (where I'll be riding in the dark blue kit). A new course, a new chapter -- same mission. And then, I'll be in the pink coach kit for Cape Cod!

-- Coach Jon

So you want to buy a bike

Bike Buyer's Guide | Coaches Corner
Coaches Corner

So You Want to Buy a Bike

Quick housekeeping: if you're shopping for your third Dogma or your next S-Works build, this post isn't for you. This is for the person who is new to road cycling, or close to it, and wants honest guidance before walking into a shop.

Because walking into a bike shop unprepared can be overwhelming. Bikes from $900 to $12,000 all look roughly the same. The sales staff speaks a different language. And nobody wants to feel like they got taken advantage of on a purchase this size.

So let's talk through what actually matters.

The Real Cost

Let's be direct: it is very difficult to find a quality road bike for under $1,000 new. The entry-level aluminum road bike from one of the most popular brands in the world is $1,199.99. That's before you've bought a single other thing.

And you will need other things. Running shoes are genuinely lousy for cycling -- they flex in all the wrong places and waste energy on every pedal stroke. A helmet is non-negotiable. You'll want cycling shorts, gloves, water bottles, and a basic tool kit for flat tires. Figure an additional $300–500 on top of your bike budget to get properly outfitted.

After your bike, the single best investment you can make is a quality pair of cycling shorts. Not a jersey. Not shoes. Shorts. Your chamois (that's the padded liner) is the difference between a comfortable five-hour ride and a miserable one. Don't cheap out on it.

Geometry Matters More Than Brand

Road bikes come in different geometries -- basically, different body positions they put you in. For long-distance riding, this is the most important decision you'll make. The two bikes below look similar at a glance. They are not the same experience over 60 miles.

Race Geometry
Aggressive / Performance

Shorter wheelbase, compact cockpit, steeper seat tube. Optimized for power and aerodynamics. Brilliant if you're racing. Less forgiving over a six-hour fundraising ride.

Think: Porsche 911. Brilliant machine -- just not for all day.

When you walk into a shop, ask specifically for endurance geometry bikes in your price range. Any good salesperson will know exactly what you mean.

What to Look For

Feature What to Ask & Why It Matters
Frame Material Each material has real strengths. Here's what nobody in the shop will tell you unprompted.

Aluminum is heavier than carbon but genuinely tough. A well-made aluminum bike ridden and maintained properly can last decades -- not an exaggeration. It transmits more road vibration, but it shrugs off the kind of impacts that would crack a carbon frame.

Carbon is lighter, can be tuned for a smooth, lively ride, and many carbon bikes are excellent. Just know going in that carbon is more vulnerable to impact damage than it looks -- a bad pothole or a tip-over in the wrong spot can crack a seat stay invisibly. Most come with warranties, and plenty of people ride carbon for years without a problem. Eyes open.

Titanium is the long game. Lighter than aluminum, more durable than carbon, and genuinely indestructible with normal use. Harder to find and more expensive, but a ti frame bought today could be the last frame you ever need to buy.

Aluminum Carbon Titanium
Geometry Ask for "endurance" or "relaxed" geometry. Avoid aggressive race geometry for long-distance charity rides. This single decision affects your comfort more than any other spec on the bike.
Disc Brakes Standard on most new bikes now, and worth it. Better stopping power in all conditions, especially wet roads. Rim brakes work fine but are increasingly yesterday's technology.
Disc
Gearing This has changed dramatically over the years and almost entirely for the better. When road bikes first became popular, the largest cog on the rear cassette might have been 14 teeth -- meaning you either had the legs to grind up a hill or you walked. Modern bikes routinely come with rear cassettes topping out at 32, 34, even 36 teeth, giving you a genuinely easy climbing gear that lets you spin rather than suffer.

Ask specifically about the largest rear cog and the smallest front chainring. The easier that combination is, the more climbing-friendly the bike. For Westchester terrain and anything with real elevation, you want options back there.
Large rear cassette (30t+)
Tire Clearance Wider tires (28mm–32mm) are more comfortable and have better traction than the skinny 23mm tires of the past. Ask how wide a tire the frame can accommodate. More room = more options.
28mm+ 23mm only
Components The derailleurs, shifters, and brakes are made by a small handful of companies. You don't need to know the names -- just ask the salesperson which component tier the bike is specced with and what you gain by spending more. There's usually a clear answer.
Proprietary Parts Ask: "How many components on this bike are proprietary?" Proprietary parts can only be replaced by that brand -- which means sourcing replacements is a nightmare. Stick to bikes with conventional, widely-available components.
Avoid Proprietary
Service Package A good shop includes free tune-ups for at least the first year. Ask upfront. The shop's long-term service relationship is sometimes more valuable than the bike itself.
Fit The bike has to fit your body -- not just your height. Ask about a basic fit with purchase (saddle height, reach adjustment). A bike that doesn't fit will hurt you regardless of how good it is.

Budget Reality Check

$1,000–$1,800
Entry Level

Solid aluminum bikes from reputable brands. Heavier than carbon, but perfectly capable of doing everything we're training for. A great place to start.

$1,800–$3,500
Sweet Spot

Where the real value lives. You start seeing carbon frames, better components, and noticeably lighter, more responsive bikes. Most experienced riders are happy here for a long time.

$3,500+
Performance

Gains are real but increasingly subtle. You're paying for lighter weight and premium components. Wonderful bikes -- but the entry-level version of you doesn't need to go here yet.

A word on weight. There are 453 grams in a pound, and a lot of high-end bike pricing is really just paying for weight savings -- 100 grams here, 200 grams there. Most recreational riders genuinely cannot feel the difference between 250-gram pedals and 175-gram pedals. What you will notice is weight coming off you. The best upgrade you can make to your bike's power-to-weight ratio doesn't cost anything at the bike shop.

Buying Used

The used bike market looks attractive on paper. It is also where you can make a very expensive mistake.

Caveat Emptor

A used bike -- especially a carbon one -- on Facebook Marketplace or Craigslist comes with zero history. You have no idea if it was in a crash. You have no idea if a frame crack is hiding under the paint. You have no idea if it fits you, and there's no return policy when you find out it doesn't.

I only recommend buying used from someone you know personally, who can give you the honest history of that bike. Buy it from a teammate, someone in the club, or a trusted friend in the riding community. That's it. The savings aren't worth the risk if you don't know where that bike has been.

Buying Online

A Word on This

Buying online is fine if you know exactly what you want and have already done your homework. What is not fine: visiting a shop, using their expertise, getting fitted on their floor, and then going home to buy the same bike cheaper online. That's taking without giving back, and those shops are how our community stays intact.

If you find the same bike for less online, call the shop and ask them to match the price. Most will come close. They'd rather make the sale and keep a customer than lose you to the internet. Give them the chance.

The Shop

There's an old saying in cycling: you're not buying a bike, you're buying a bike shop. The shop you buy from will service your bike, answer your questions for years, and be your resource every time something goes wrong on the road. Choose carefully.

Before You Go

Call ahead. Tell them your budget and ask if they have a good selection in that range. There is nothing more frustrating than walking into a shop that specializes in $8,000 bikes when you have a $1,500 budget -- or vice versa. A good shop will tell you honestly whether they can help you. If they can't, they should point you somewhere that can.

When you're in the shop, notice how you're treated. Are you welcomed? Does the salesperson ask questions and actually listen to the answers? Do you feel like they're trying to get you on the right bike, or the most expensive one? These things matter more than you'd think, because you'll be going back to this shop for years.

And finally -- ride the bike before you buy it. Any shop worth going to will let you take it out. Ride it over rough pavement, up a hill, and at speed. Specs only tell part of the story. The rest is how it feels when you ride it.

Any questions -- bring them to the ride. Happy to talk bikes.

-- Coach Jon

Guidance in this post draws on two excellent resources: Bicycle School: How to Buy a Bike and the Bicycling Magazine Century Ride Bike Guide. Both go much deeper if you want to keep reading.
Video Block
Double-click here to add a video by URL or embed code. Learn more

How to Ride in a Group Without Making Enemies

Milton Point, Rye, NY

How to Ride in a Group Without Making Enemies | Coaches Corner
Coaches Corner

How to Ride in a Group Without Making Enemies

Group riding is one of the best things about cycling -- the drafting, the shared effort, the feeling of rolling through Westchester with a pack of people who showed up for the same reason you did. Once you get comfortable with a few basic habits, it becomes second nature and the whole ride opens up. Here's what makes it click.

It all comes down to two words: predictability and communication. When the rider behind you always knows what you're about to do, everything flows.

What to Bring

A well-packed kit means you spend the ride enjoying it instead of improvising. Here's the setup that covers you for a great day out.

Personal Info

ID, insurance card, emergency contact, any relevant health info, phone, and a little cash. Keep it all accessible on your person so it's there when it counts.

Fix-a-Flat Kit

A spare tube in the right size for your wheel, tire levers, and a pump or CO2 cartridge. A flat at mile 15 is an adventure when you're prepared and a disaster when you're not.

Hydration

Two full water bottles or a hydration pack. Start sipping early and keep sipping -- by the time you feel thirsty, your body is already running behind.

Pocket Food

Bars, trail mix, whatever fuels you well. Eat before you're hungry, and stick with what you know -- a long ride is a genuinely terrible time to try something new.

Before You Roll

Pump your tires the night before so you catch a slow leak at home instead of at mile 12. Give your brakes a quick squeeze, scan your tires for anything embedded in the rubber, and lube your chain if it needs it. Eat a solid breakfast at least two hours before the start -- you'll feel the difference.

Riding in the Pack

Stay right, hold a straight line, and keep a safe gap from the wheel ahead. The big one: never overlap your front wheel with the rear wheel of the rider in front. If your wheels touch, you go down -- it's physics, not bad luck. Keep pedaling even when you want to coast; a steady cadence keeps the whole group flowing smoothly and makes you a pleasure to ride behind.

Calling It Out

Say "car back," "slowing," "stopping," "on your left," "hole," "gravel." Every time. Pass it down the line yourself -- don't assume the rider behind you caught it from someone else. One thing I never call: "clear." Every rider judges each intersection independently. A situation can change in seconds and no one should be crossing on your word.

Passing

Left side only. Look back before you move. Call "on your left" to every rider you pass, not just the first. Once you're clear, communicate before moving back into line.

Regrouping

Single file on the shoulder, fully clear of the lane. Give everyone a moment to catch their breath -- it's one of the best parts of the ride. Just keep your bike out of traffic.

Single File

Single file is always the rule. It keeps the group predictable to cars, to other cyclists, and to each other. When in doubt, tighten up the line.

The Roads Are Shared

Cyclists have the same legal rights and responsibilities as cars in New York -- which means we also get the same respect when we ride like we belong there. Signal your turns, stop at lights, and ride with traffic. On winding roads, hug the right -- cars cut corners and drift across the yellow line more than you'd expect. The car you're not expecting is always the one to watch for.

Quiet roads have a paradox: you don't expect cars to be there, and cars don't expect you. Ride like something might come around every blind corner, because occasionally it does.

Climbing and Descending

Going up: sit tall, breathe deep, spin a lighter gear rather than grinding. Weight back on the saddle, hands loose on top of the bars. The riders who look effortless on climbs have usually just learned to stay relaxed. Going down: hands in the drops or on the hoods, weight back, feet level with the outside foot down on curves. Look far ahead -- three telephone poles is a good rule -- and leave more space between you and the rider in front than you would on the flats.

If Someone Goes Down

Hopefully you never need this. Know it anyway.

⚠ Emergency Protocol

1

Secure the scene first. If the rider is in the road, stop traffic in both directions before anyone approaches. Use bikes or a car with hazard lights as a shield. Approach slowly -- don't run and become a second hazard.

2

Do not move the rider. Unless they are in immediate danger from traffic, leave them where they are. Moving someone with a spinal injury can make it catastrophic. Keep them still and calm.

3

Delegate immediately. One person calls 911. One person directs traffic at a safe distance in each direction. One person stays with the rider. If there are more people, keep bystanders back.

4

Keep the rider warm and the helmet on. Use a jacket if you have one. Do not remove the helmet, especially if the rider is unconscious. That's the paramedics' job.

See You Out There

The riders who make a group great aren't necessarily the fastest ones -- they're the ones who are smooth, communicative, and aware of everyone around them. That's a skill you can build starting on your very first ride, and it makes the whole experience better for everyone.

-- Coach Jon

Much of the technical guidance above is adapted from Suggestions for Riding in Groups, a resource that's been circulating in the cycling community for years and holds up remarkably well. Grateful for it.

The Off-Bike Work That Makes You Faster On It

Shelter Island

Strength Training for Cyclists | Coaches Corner
Coaches Corner

The Off-Bike Work That Makes You Faster On It

There's a version of you that rolls into mile 80 still sitting tall, still pedaling smoothly, still having fun. That version did a little work away from the bike. Not a lot -- we're talking 20 minutes, once or twice a week, on your living room floor. The payoff on a six-hour ride is enormous.

Most cyclists assume strength training means a gym, a program, and a significant time commitment. It really doesn't. A short circuit of six exercises is enough to build the strength and stability that keeps you riding well when everyone else starts to fade.

Consistency beats complexity every time. A simple circuit done weekly will do more for you than an ambitious program you can't fit into your life.

What's in It for You

Every downstroke is powered by your glutes and quads. When those are strong and your core is solid underneath them, that power goes straight into the pedal. When they're not, your body finds workarounds -- and those workarounds, repeated thousands of times over a long ride, are where fatigue and injury come from.

A stronger upper body and core also means your shoulders, neck, and lower back stay comfortable deep into a long ride. And working each leg individually in exercises like the split squat smooths out any imbalances that develop naturally over years of riding -- which is a quiet source of both lost watts and unnecessary soreness.

Lower Body

Squat
Glutes & Quads

The most direct translation to the pedal stroke. A stronger squat means more power on every downstroke and a more stable base when the road pitches up.

Want more challenge? Add dumbbells, a resistance band, or try pausing at the bottom for a three count.

Feet shoulder-width apart. Knees track over your toes -- not caving inward.
Split Squat
Single-Leg Strength

Cycling is a one-leg-at-a-time sport. Working each leg independently is the fastest way to find and address any imbalances you've been quietly compensating for on the bike.

Want more challenge? Hold a weight in each hand, add a band, or pause at the bottom.

Aim for two 90-degree angles -- front leg and back leg -- at the low point.
Heel Raise
Calves & Ankles

The calf finishes the pedal stroke at the bottom. Heel raises build the strength and endurance there that compounds over hundreds of miles.

Want more challenge? Progress from two legs to one leg at a time.

Slow and controlled on the way down -- that's where a lot of the work happens.

Upper Body

Push Up
Chest, Shoulders & Triceps

Your arms bear your weight on the bike for hours at a time. Push ups build the upper body baseline that keeps you from slumping on long climbs and in the drops.

Want more challenge? Elevate your feet. Easier? Use a bench or chair.

Lead with your chest, not your chin. Your whole body moves as one unit.

Core

Core strength is what turns leg power into forward motion. Without it, energy leaks out through a soft midsection instead of driving the pedals. It's also what keeps you riding tall and comfortable when the miles start to add up.

Hip Bridge
Glutes & Pelvic Stability

Pelvic stability is the foundation of an efficient pedal stroke. Hip bridges target the glutes in a way squats don't fully reach -- especially valuable if you spend a lot of time sitting during the day.

Want more challenge? Try them single-leg.

Squeeze your glutes at the top. Let them do the work, not your lower back.
Side Plank
Lateral Stability

Side-to-side sway wastes energy and wears on your hips over long efforts. Side planks build the lateral stability that keeps you tracking straight and efficient, especially when you're out of the saddle on a climb.

Want more challenge? Add a hip dip or extend the hold. Easier? Drop to your knees.

Shoulder, hip, and foot in one straight line. Hips stay lifted.
Plank
Core Endurance

Long rides demand core endurance more than raw strength. The plank builds exactly that -- the ability to hold a stable position for extended periods, which shows up in your form during the final hours of a big day.

Want more challenge? Lift one leg off the ground in alternation. Easier? Straight-arm plank.

Shoulder, hip, heel -- one line. Don't let the hips sag.

The Circuit

String them all together and you have a complete 20-minute workout. Two or three rounds is plenty. Screenshot this and keep it on your phone.

Your Weekly Circuit

Squat 2–4 sets  ×  12 reps
Push Up 2–4 sets  ×  10 reps
Split Squat 2–4 sets  ×  10 reps each leg
Heel Raise 2–4 sets  ×  20 reps
Hip Bridge 2–4 sets  ×  30 sec hold
Side Plank 2–4 sets  ×  30 sec each side
Plank 2–4 sets  ×  30 sec hold

Fitting It In

Off-Season

Two to three sessions a week is a great window to build. Riding volume is lower and recovery is easier, so it's the ideal time to make real gains.

In-Season

Once or twice a week keeps everything you've built. Keep it on non-ride days when you can -- arriving at Saturday's ride fresh is always the priority.

If your schedule is already packed, even one session a week done consistently makes a real difference. You can fold it onto a ride day as a warmup or cooldown, or swap 20 minutes of easy spinning for the circuit on a recovery day. There's always a way to make it work.

See you out there.

-- Coach Jon

Exercise selection and programming guidance adapted from two excellent resources: Strength Training for Cycling with Minimal Equipment by Greg Lewandowski, MSc., CSCS (Cycling Canada / Sport Institute Network Ontario), and the Cycling Strength and Conditioning Workshop curriculum. Both are worth reading in full if you want to go deeper.

JOIN OUR STRAVA CLUB

Join Our Strava Club | Coaches Corner
Coaches Corner
Strava

Join Our Strava Club

The group doesn't have to stop when the Saturday ride does. Our Strava club is where the team stays connected between rides -- sharing miles, cheering each other on, and building the kind of momentum that carries you to the start line ready to go.

If you're already logging rides on Strava, joining takes about 30 seconds. If you're not on Strava yet, it's free, it tracks every ride automatically from your phone or GPS, and it makes training a lot more fun when you can see what everyone else is up to.

Join the Club

See what your teammates are riding, log your own miles, and show up to the group ride knowing you've already put in the work.

Join on Strava →

Why It's Worth It

Ride the Routes

All of our group ride routes will be mapped and shared on Strava. Load them onto your GPS or phone before you roll and you'll always know where you're going.

Set a Goal

Strava lets you set distance and elevation goals and tracks your progress automatically. Watching those numbers climb toward the ride is genuinely motivating.

Find Your People

See what your teammates are riding, give them a Kudos, share your own miles. The community on here is real -- and it makes the solo training days feel a lot less solo.

Build Toward the Ride

Every mile you log between now and the event is a deposit. The club is where you see the balance growing week by week.

See you on the feed.

-- Coach Jon

Cycling In Westchester County

Cycling in Westchester County -- Where Should I Start?
Coaches Corner — Coach Jon Reitzes

Cycling inWestchester County

Where should you start? It depends on where you are in your journey -- and that's a great place to begin.

One of the things I love most about coaching this team is that everyone comes in at a different place. Some of you have been riding for years. Some of you are just getting your bike out of the garage for the first time since last spring. And some of you are brand new to cycling altogether. All of that is completely fine -- that's exactly what this group is for.

Our group rides are designed to be fun, social, and progressive. We build mileage as the season goes on, we rotate locations to keep things fresh, and most importantly, we ride together. But here's the honest truth: if you have specific distance goals for the summer, our bi-weekly rides alone won't get you there. You'll need to be putting in miles on your own too.

Spin classes are fantastic -- I recommend them up to twice a week. They're great for your cardiovascular fitness, your leg strength, and your mental toughness. But after that, you really want to be on your own bike, moving through actual planet Earth. There's no substitute for it. You learn how to handle your bike, how to pace yourself, how to read terrain, and how to manage your energy over longer distances -- and none of that happens in a studio.

The goal is to build a handful of repeatable 15-20 mile routes near your house that you can knock out in about an hour. Doing the same routes consistently is actually a feature, not a bug -- it lets you track your progress week over week, watch your times improve, and feel the fitness building in real time. That's motivating in a way that varying routes constantly just isn't.

Not sure where to start near your neighborhood? Reach out and I'll help you map something. Seriously -- that's what I'm here for.

In the meantime, here are some great options right here in Westchester to get you started.

Route 01
North County Trailway
A beautifully paved former railway line running through the heart of Westchester -- this is one of the best dedicated cycling paths in the region. The rail trail surface is smooth, the grade is gentle (it was a train line, after all), and the scenery is gorgeous. It connects all the way up toward Mahopac as part of the Empire State Trail, so you can make it as long or as short as you like.
A word on rail trails: No cars is a gift -- but stay alert. Hikers, kids, dogs, and cyclists wearing headphones all share the path, and they don't always stay to the right. Ride with awareness, call out when passing, and keep your speed sensible around blind curves.
Route 02
South County Trailway
The South County Trailway is the southern counterpart to the North County, running from Yonkers up through the county on another paved rail trail. It's a great option for riders in the lower part of Westchester and connects with other trails to let you build longer rides. Same rules apply as the North County -- share the path and stay alert.
Route 03
Bronx River Parkway Cycling Sundays
This is a Westchester classic and genuinely one of the best things about living here. On designated Sunday mornings from May through October, a 13-mile stretch of the Bronx River Parkway is closed entirely to cars and opened up to cyclists, joggers, skaters, and walkers. It's a beautiful, car-free corridor through some of the prettiest parts of the county -- and a great way to get comfortable riding on a wider road surface without traffic. Perfect for newer riders building confidence.
Worth Joining
Westchester Cycling Club
If you want more miles, more company, and more structure, the Westchester Cycling Club is one of the best resources in the county. They run rides practically every day in the summer at varying difficulty levels, starting from different locations around Westchester. It's a welcoming community, and riding with more experienced cyclists is one of the fastest ways to improve. The price of entry is remarkably reasonable for what you get.
Membership: $40/year
Join the WCC →
Need a Route Near You?

Let's Map Your Home Base

Tell me your neighborhood and I'll help you build a repeatable 15-20 mile route you can ride all season. Watching your times drop on a familiar route is one of the best feelings in cycling.

See the Full Training Schedule →

Training Ride Schedule!

2026 Training Schedule -- Coach Jon
Breakthrough T1D — Westchester / NYC

2026 TrainingSchedule

Sign Up for Rides via signup genius →
Mar 14 2026
8:00 AM
Milton Point Provisions
615 Milton Point, Rye, NY 10580
Apr 11 2026
8:00 AM
Greenwich Municipal Parking Lot
Behind Saks Fifth Avenue, Greenwich, CT
Apr 25 2026
8:00 AM
Rye Neck High School
310 Hornridge Rd, Mamaroneck, NY 10543
May 9 2026
8:00 AM
Bedford Hills Train Station
60 S Bedford Rd, Bedford Hills, NY 10507
May 23 2026
8:00 AM
Chappaqua Train Station
1 Station Plaza, Chappaqua, NY 10514
Jun 6 2026
8:00 AM
SUNY Purchase
735 Anderson Hill Rd, Purchase, NY 10577
Jun 20 2026
8:00 AM
Greenwich Municipal Parking Lot
Behind Saks Fifth Avenue, Greenwich, CT
Jul 11 2026
8:00 AM
Milton Point Provisions
615 Milton Point, Rye, NY 10580
Jul 25 2026
8:00 AM
Bedford Hills Train Station
60 S Bedford Rd, Bedford Hills, NY 10507
Aug 8 2026
8:00 AM
SUNY Purchase
735 Anderson Hill Rd, Purchase, NY 10577
Sep 19 2026
8:00 AM
Seven Lakes Drive Parking Lot
Harriman State Park, NY
Oct 3 2026
8:00 AM
Location TBD
Check back for updates
TBD
Oct 17 2026
8:00 AM
Location TBD
Check back for updates
TBD
Oct 31 2026
8:00 AM
Location TBD
Check back for updates
TBD
Nov 14 2026
8:00 AM
Location TBD
Check back for updates
TBD

All rides depart at 8:00 AM sharp. Questions? Reach out to Coach Jon.

Sign Up on SignUpGenius →

Coach Jon Checking In -- Yes, Even in a Snowstorm

Doe, a deer!

Right now, we're in the middle of our second major snowfall of the season, and I know cycling may be the furthest thing from your mind. Fair enough. But here's the thing -- winter is actually one of the best times to lay a foundation for a strong ride. You don't need to be logging miles in a blizzard to make progress. A little intentional movement now, even indoors, can make a huge difference when the weather finally cooperates.

IS YOUR BIKE READY?

I know the feeling: "Where's my bike? I think it's in the garage... somewhere." March is the time to dig it out and bring it in to your local shop. Have the cables checked, the wheels trued, and the drivetrain cleaned of last year's gunk. I also like to start each spring with fresh handlebar tape -- it's a small thing, but it makes the bike feel new again.

While you're at it, there are a few basic maintenance skills every rider should have in their back pocket:

Lube your chain. Your chain and gears are metal on metal -- they need care. Pick up a bike-specific lubricant; I'm a fan of ceramic lube for the spring, which reduces friction, repels dirt, and lasts longer than standard wet or dry lubes. In the summer, I move to dry lube. To apply it, wipe your chain down with a clean rag first, then apply a single drop of lube to each link while slowly backpedaling. Let it sit for a few minutes, then wipe off the excess -- too much lube attracts grime. Over time, grit builds up, and you'll want to degrease the chain entirely before re-lubricating. A good rule of thumb: degrease every few months of regular riding, or whenever the chain starts looking gunky. This video is a great primer: https://www.youtube.com/watch?v=cqkitFhUq_4

Pump your tires before every ride. Yes, every single ride. Road bike tires run at high pressure -- typically 100 to 120 psi -- and they lose air even when sitting still. Make sure you have a quality floor pump with a gauge and know how to use it. This one step prevents a surprising number of problems out on the road.

Know how to change an inner tube. At some point, you will get a flat. It's not hard to fix, but it can be a pain if you're not prepared. Keep a spare tube, a set of tire levers, and either a small hand pump or a CO2 inflator in a saddle bag mounted under your seat. I also keep a multitool in there. Watch a YouTube video this winter and practice at home -- you'll be glad you did.

Know how to adjust your seat and handlebars. When bikes get transported, things get bumped out of position. And as your fitness and riding style evolve, you may want to make small adjustments. Understanding the basics here gives you flexibility and keeps you comfortable on long rides.

DO YOU NEED TO BUY A BIKE?

I'm jealous. New Bike Day is the best.

A few things to keep in mind: be honest with yourself about the type of rider you are right now, not the rider you hope to be someday. Don't buy a bike because you imagine yourself racing through Alpe d'Huez (and if that's actually your plan, again, I'm jealous). If your longest ride to date has been 10 miles and your goal is 50, get the bike that fits your current reality with that 50-mile goal in mind. If you're just getting started, the goal is to build a biking habit on a machine you genuinely love. That doesn't mean emptying your bank account. It means getting a bike that fits properly, is made of materials suited to your riding goals, and makes you feel good every time you swing a leg over it.

I love bike shops and believe strongly in having a relationship with your local one. That said, shops in our area vary widely in inventory and price point. Greenwich alone has three shops, each with a very different range. Some shops carry primarily high-end brands and simply don't have the floor space or inventory for moderately priced bikes. Know your budget going in, do a little research, and don't be afraid to visit a few shops before committing.

On that note -- fit matters more than price. A properly fitted $600 bike will be more enjoyable to ride than an improperly fitted $10,000 one. I guarantee it. Discomfort compounds over the miles, and a bike that doesn't fit will eventually make you not want to ride at all.

If you're buying new, go to a shop that will put you on a trainer, take your measurements, and order the right size and configuration for your body. If you're working with an existing bike or buying used, get a proper fitting done by a shop. They'll make sure your hips are square, your knees are aligned, your handlebars are set correctly, and your brakes and cables are in good shape. It's worth every penny.

A WORD ON SPIN CLASSES

Love them! Do them! But understand what they are -- and what they aren't.

Spin classes are typically under an hour, and the goal is to push you hard: max effort, strong heart and lungs, powerful legs. All of that is great training for any kind of riding. But a long outdoor ride is a different animal. Out on the road, we're playing the long game -- riding efficiently, using our gears to do the work, conserving energy, and yes, enjoying the moments when gravity does us a favor on a downhill.

If you're used to grinding it out in spin class and spending a lot of time out of the saddle, you may need to dial that back when you hit the road. To keep moving for five or six hours at a time, the goal is to go as far and as fast as possible while using the least amount of energy. It's a different mindset, and the sooner you start building it, the better.

SNACKS, SNACKS, SNACKS

Now is a great time to beta test your ride fuel.

One of the biggest differences between a 45-minute class and a full-day ride is that on the road, you need to refuel at least once an hour. I used to think of it in terms of carbs -- roughly 30 to 45 grams per hour -- but these days I find it easier to think in real food: a pack of M&Ms, half a sandwich, half a banana. You want something portable, easy to eat while moving, and most importantly, something you actually like.

Some of my go-to's: That's It bars, Made Good Granola Bites, and bananas. Start experimenting now so you know what works for your stomach before you're 30 miles in.

That's it for now! Let's hunker down in the storm -- maybe knock out a Peloton class or two -- and start getting excited for the road ahead. Check out my training schedule here and get signed up:

More soon. Stay warm and stay moving.

Ride on,

Coach Jon